~/guides/MACHINE.md
Make reels with Claude Code as code: HyperFrames renders them frame by frame to MP4, no AI video credits
HeyGen's open-source HyperFrames: install the Claude Code plugin and one sentence becomes a reel in code. Setup, our 12 s test, a hook-first prompt, costs.
Watch the reel on InstagramComment #MACHINE to get this guide
The reels on this account aren't generated by an AI video model; they are computed from code, frame by frame. You can do the same: HyperFrames is an open-source tool from HeyGen. Install its Claude Code plugin, describe the video you want, and Claude writes the whole clip as a web page and renders it to MP4, with no AI video credits. This guide shows the 12-second clip we actually made, then walks you through installing it, what to say first, how to check and export, and which features cost money.
01The result first: a 12-second reel we made with HyperFrames
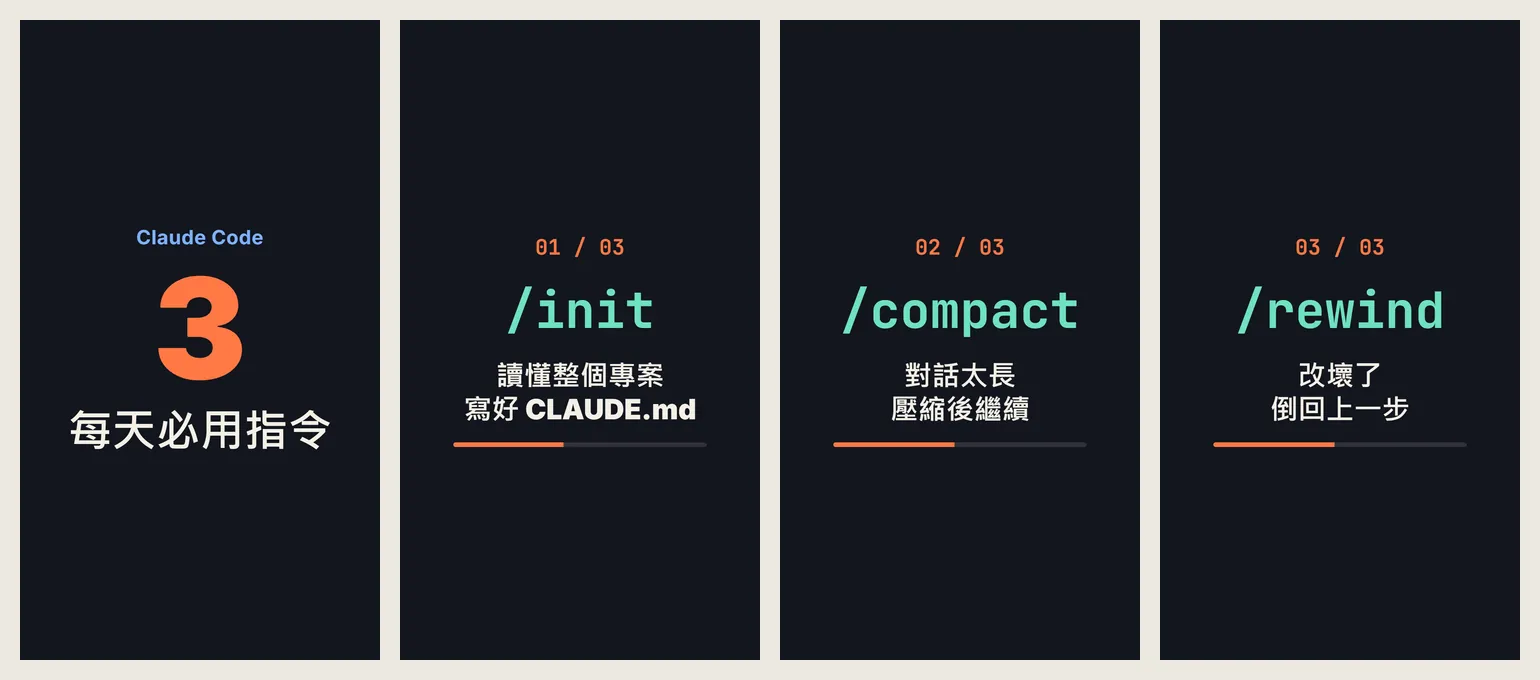
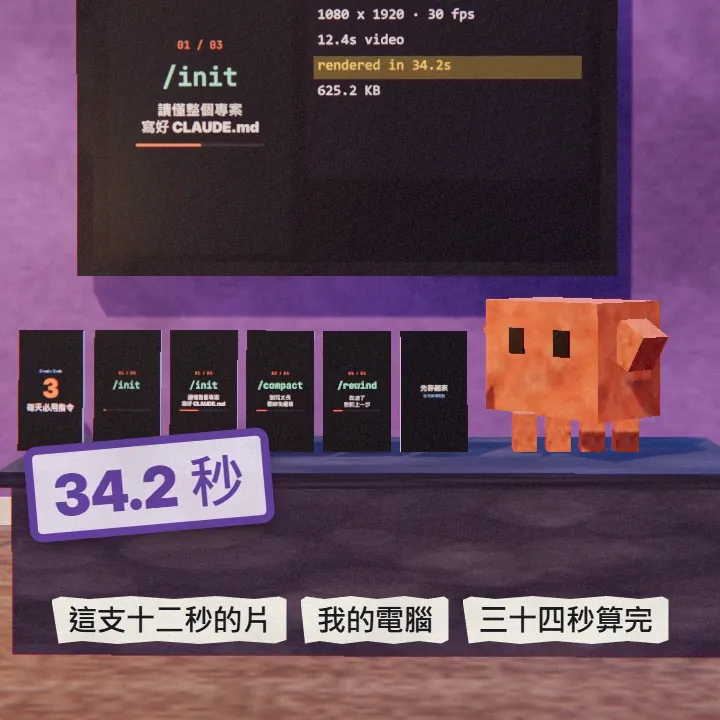
This 12.4-second vertical clip (1080×1920, 30 fps) was written by Claude as a single HTML file following HyperFrames' official skill, then rendered to MP4 with the HyperFrames CLI. It took my Windows PC 34.2 seconds and came out at 625 KB. No AI video model was used and no credits were spent.
- 0-2.4 s hook: "Claude Code 3 daily commands", with text already on screen at frame 0.
- 2.4-10.2 s: three parts, /init, /compact and /rewind, 2.6 s each, with a progress bar.
- 10.2-12.4 s: a closing card, "save it, you'll need it tomorrow".
This is the full version of the MACHINE reel: what you need, how to install HyperFrames in Claude Code, what to say first (a hook, then three parts), how to check and export, and which features cost money.
02What you need first
- Claude Code (signed in).
- Node.js 22 or newer.
- FFmpeg (used to turn the frames into a video).
- Windows, Mac or Linux; I ran it on Windows 11.
03Install the HyperFrames plugin in Claude Code
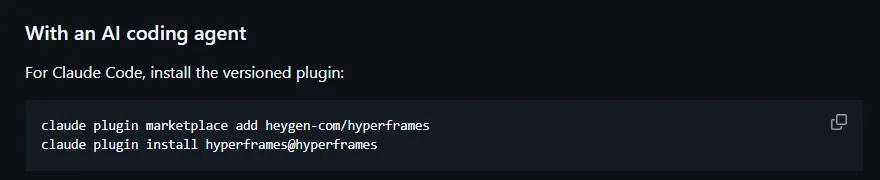
claude plugin marketplace add heygen-com/hyperframes
claude plugin install hyperframes@hyperframes
- Paste the two lines above into your terminal.
- Open Claude Code and call it with /hyperframes:hyperframes (or just say "make a video with HyperFrames").
- For auto-update: in Claude Code type /plugin → Marketplaces → hyperframes → Enable auto-update.
- Without the plugin: run npx skills add heygen-com/hyperframes in your project folder; the core skills are all you need.
04What to say first: a hook, then three parts
How good the video looks is the code's job; whether people watch to the end is the script's job. So put the hook and the three parts in your first message, and Claude lays out the scenes and timings around them.
Using /hyperframes, make a [12]-second vertical reel (1080x1920, 30 fps).
Topic: [e.g. 3 Claude Code commands I use every day]
Hook line: [one line with the result or a number, on screen at second 0]
Then three parts:
1. [first point]
2. [second point]
3. [third point]
Closing card: [e.g. save this]
2 to 3 seconds per part, big text, at most 5 English words per line. Show me a preview first and render the MP4 when I say so.

05Preview, check and export the MP4
- npx hyperframes check: checks the code, layout, motion and text contrast in one go.
- npx hyperframes snapshot --at 0,3,6: saves those seconds as images so you can look first.
- npx hyperframes preview: previews it in the browser while you edit.
- npx hyperframes render: renders the MP4 (into the renders folder by default).
Our first check caught three problems: frame 0 was empty (the cover would be blank), the first card's text stayed only 1.7 seconds, too short to read, and the closing card was too short. After putting the title on screen at frame 0, stretching each card to 2.6 seconds and giving the ending 2.2 seconds, it passed.
06What's free and what costs money
- The open-source HyperFrames CLI and plugin: free, rendering on your own computer, no credits.
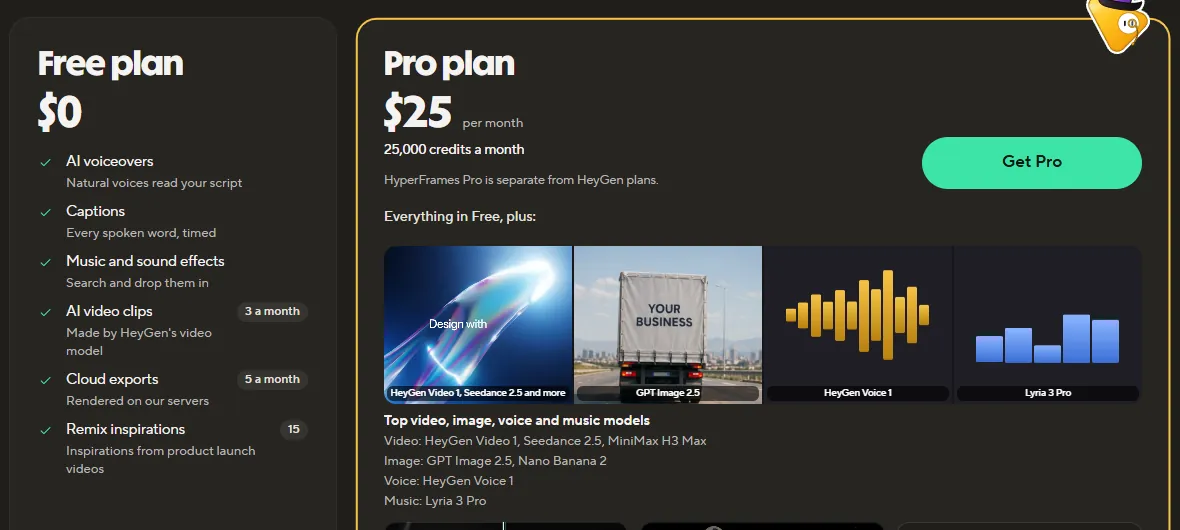
- The HyperFrames Studio desktop app: a $0 Free plan with AI voiceovers, 3 AI video clips a month and 5 cloud exports a month.
- Pro is $25 a month for 25,000 credits a month, with AI video, image, voice and music models such as HeyGen Video 1 and Seedance 2.5.
- /style-sampling (five ready-made styles) and /reverse-any-video (rebuild any video as an editable project) are Pro features.
07Good to know
- Pick your Chinese (or other non-Latin) font yourself. The bundled fonts are mostly Latin; for a fixed Chinese font, add an @font-face pointing to a font file in the project. We used Microsoft JhengHei installed on the PC, which only works for local renders; for cloud renders, ship the font file in the project.
- Render time depends on your computer. Our 12-second clip took 34 seconds, about half of it starting the browser.
- Installing and updating skills is your step: the official instructions say Claude shouldn't install them for you; it tells you which one is missing.
- The HyperFrames CLI sends usage telemetry, which the official docs say you can opt out of.
- Music and voiceover are up to you; our test reel is silent.
Sources
What should the next reel cover?
I test Claude and AI tools every day and turn the useful ones into reels. Follow @vivianlin.tech to catch each new guide.