~/guides/EDIT.md
Edit your video with Claude Code + Hyperframes: word-by-word captions, silences cut, zooms, 24 s down to 17 s
Open-source Hyperframes lets Claude Code edit your own video: cut silences, add word-by-word captions, zooms and title cards, export MP4. Real numbers.
Watch the reel on InstagramComment #EDIT to get this guide
I gave Claude Code a 23.9-second clip with several dead pauses in it and asked it to edit the clip with Hyperframes. The result is 16.9 seconds: 6 silences cut, captions that light up word by word, and a zoom and a title card on the key lines. Hyperframes is HeyGen's open-source video tool (Apache-2.0); rendering on your own machine costs nothing, and there is an official Claude Code plugin. This is the full version of the EDIT part of my Reel: what to prepare, how to install it, what to tell Claude at each step, and what tripped us up when we tested it.
01The result first: 23.9 seconds down to 16.9
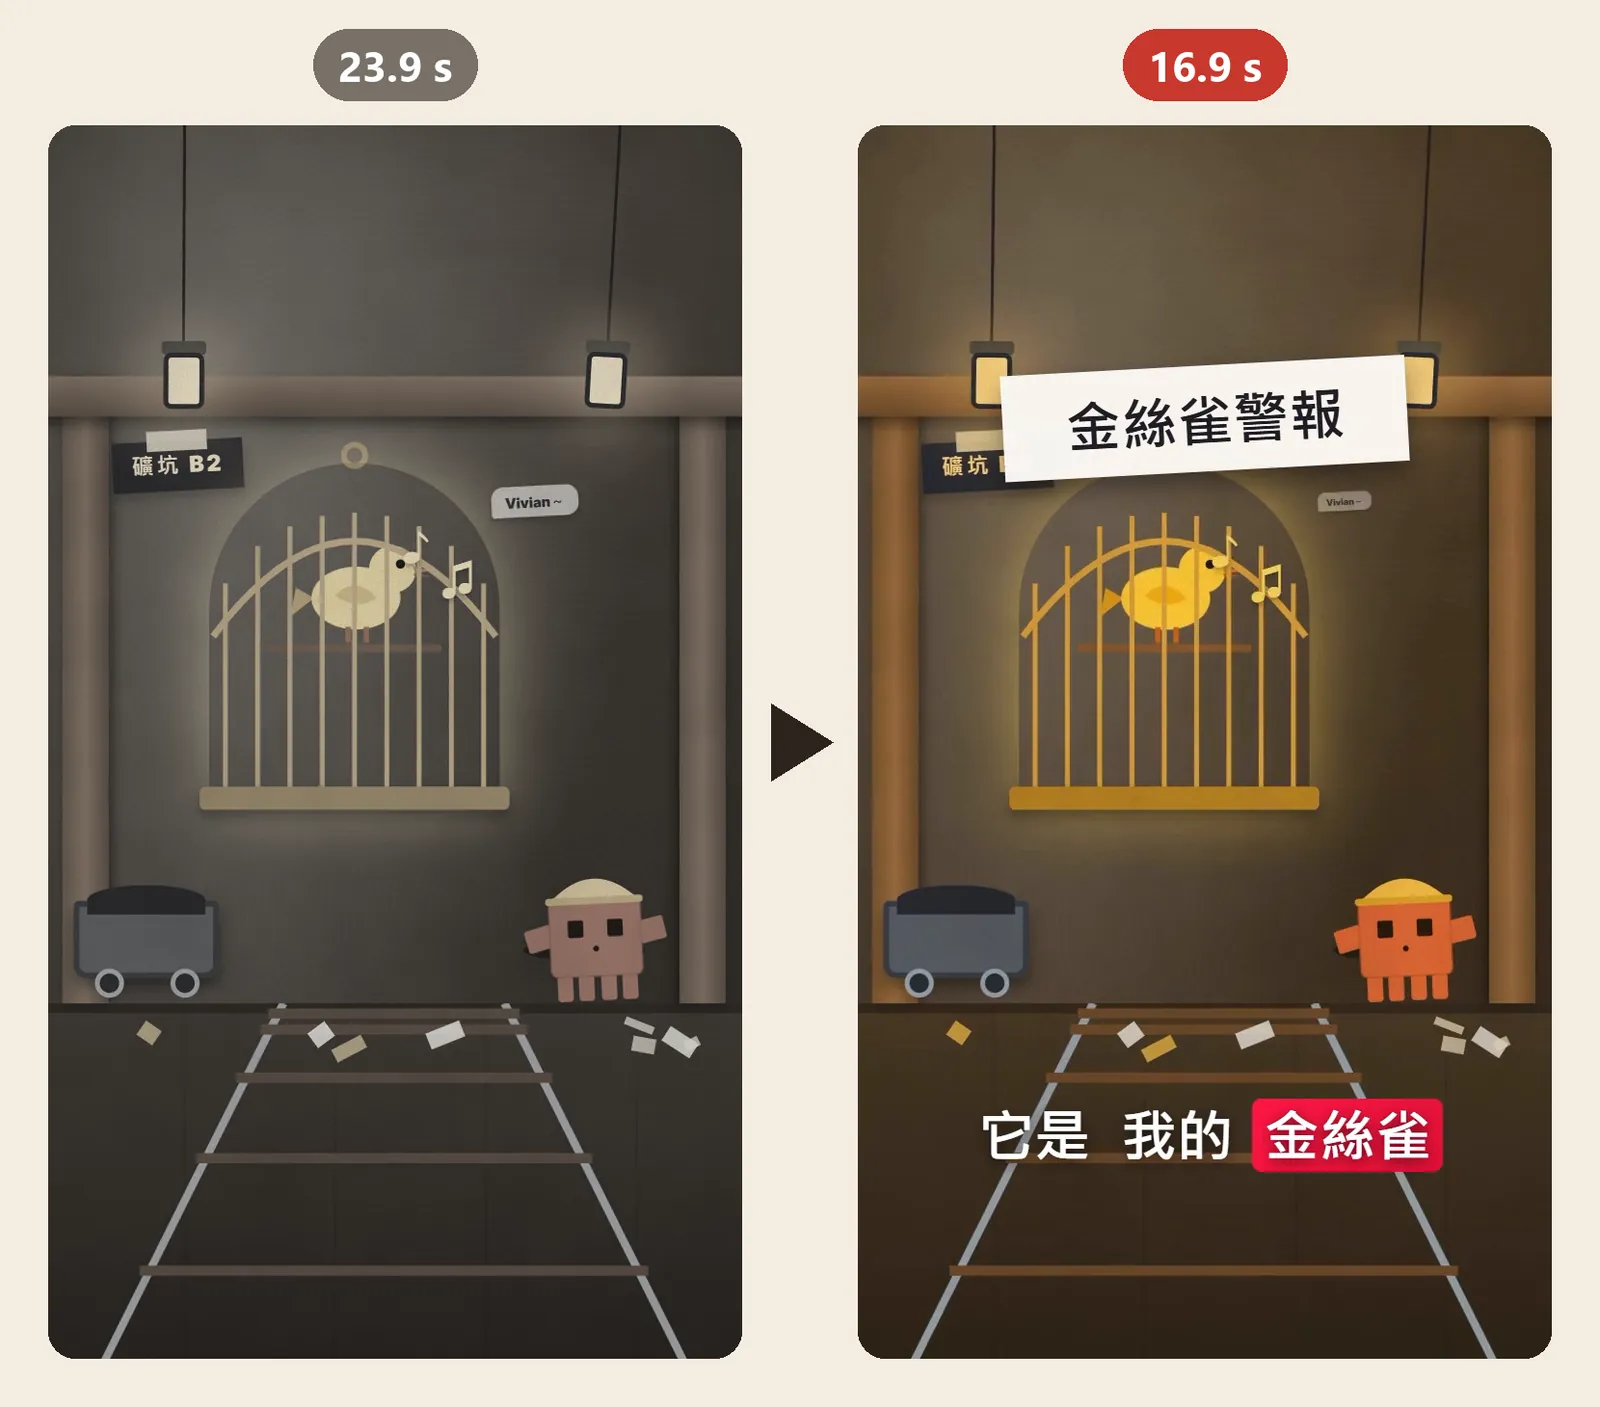
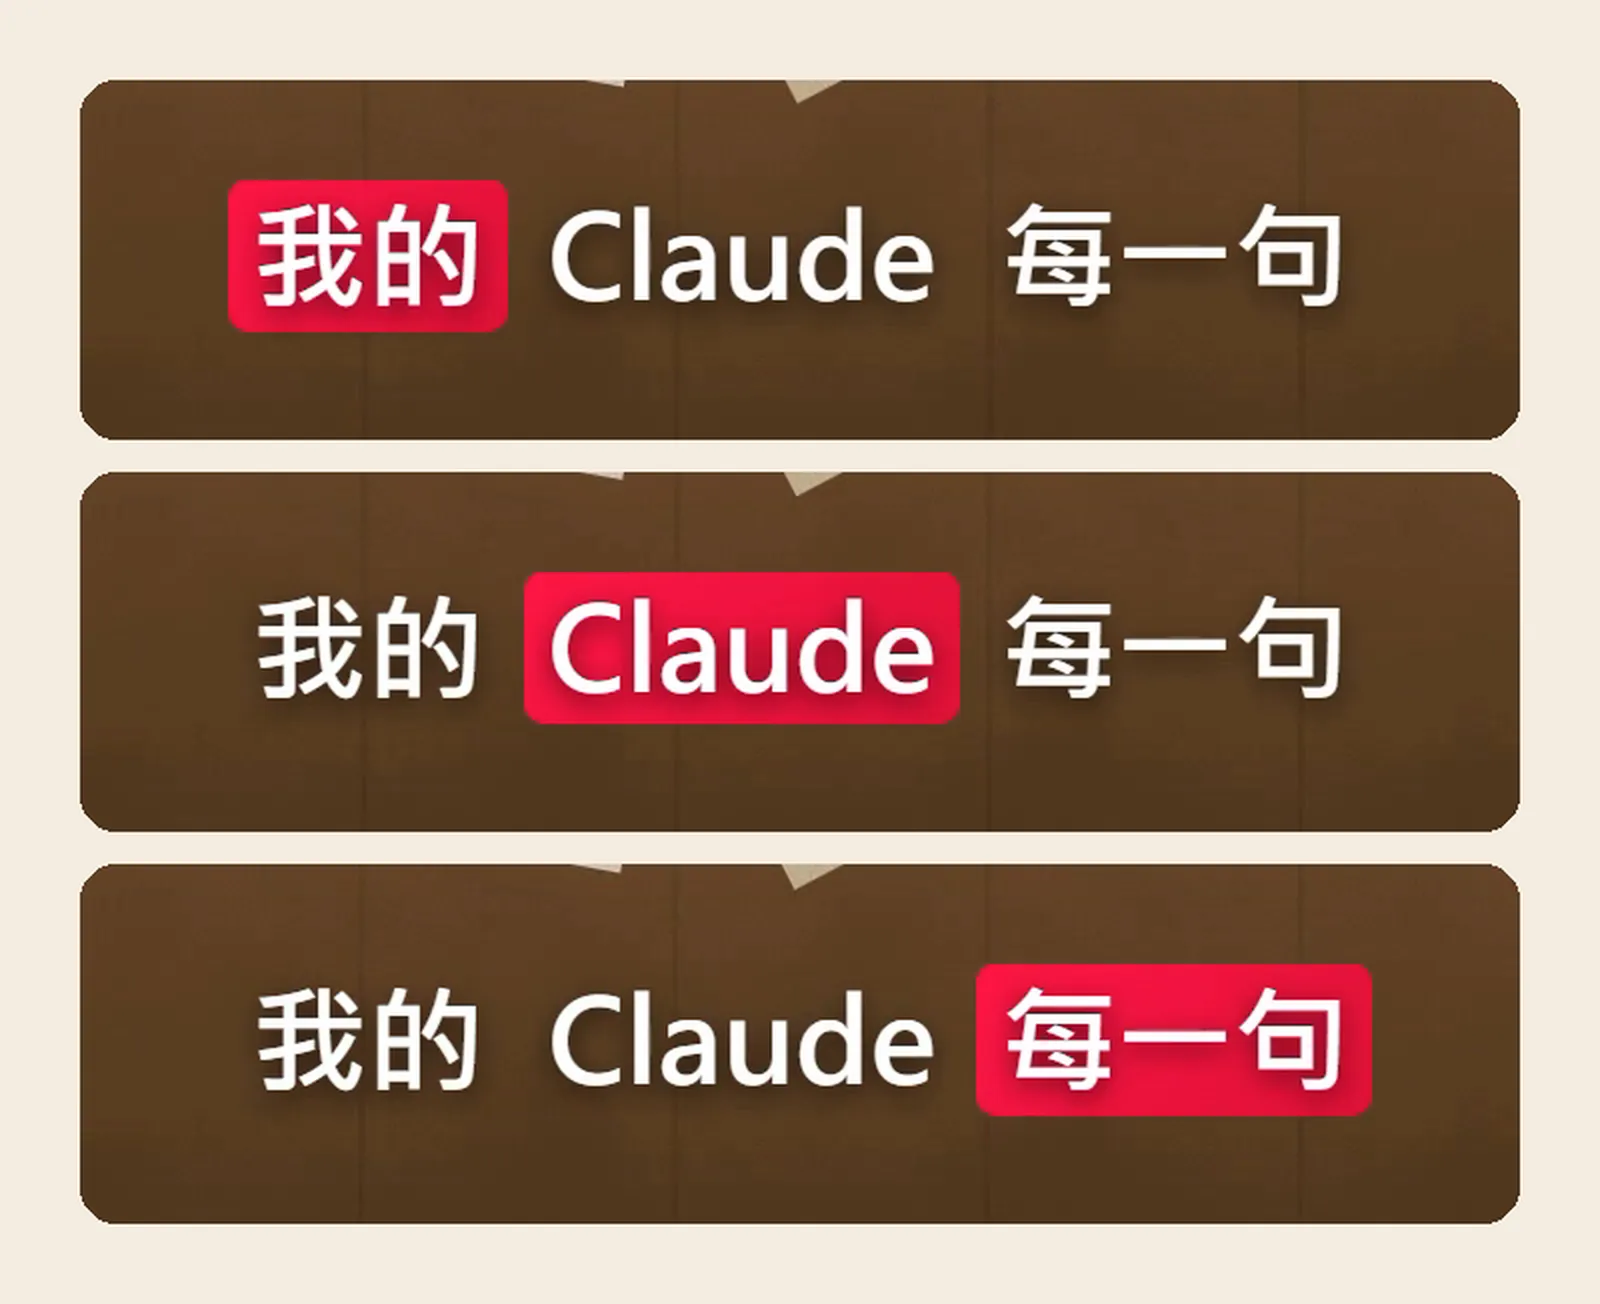
Both are real frames: the left is the raw file, the right is a frame of the MP4 Hyperframes rendered. Claude Code ran the commands on my computer with Hyperframes 0.8.185 (tested 23 Oct 2026).
One thing up front: we made the raw clip ourselves. Our Reels are already cut tight, with no silences left to remove, so I took one of our own animations and put 1 to 2 seconds of dead air back between the sentences to stand in for unedited footage. The edit and the numbers are real; only the pauses were planted by us.
- Get Node.js and FFmpeg ready, and install the Hyperframes plugin in Claude Code.
- Give Claude Code the video with one request: add captions, cut the silences, animate the key moments.
- 1. Captions that light up word by word (you need a source for the timings; see below).
- 2. Cut the silences: it measures where the sound drops out, then removes the long pauses.
- 3. Animation: a push-in and a title card on the lines you pick.
- 4. Check, export MP4, and ask for changes in plain words.
023 things to have before you start
- Node.js 22 or later. The official README lists Node.js 22+ under Requirements.
- FFmpeg. The README lists it as required too.
- Claude Code. This guide uses Claude Code; for other tools (Cursor, Gemini CLI and more) the README links to the official plugin guide.
node -v
ffmpeg -version
I'd start with a clip under 30 seconds. Ours was a 720×1280 vertical video, 23.9 seconds long.
03Install the Hyperframes plugin in Claude Code
The Quick Start in the official README gives two commands. Paste them into your terminal.
claude plugin marketplace add heygen-com/hyperframes
claude plugin install hyperframes@hyperframes
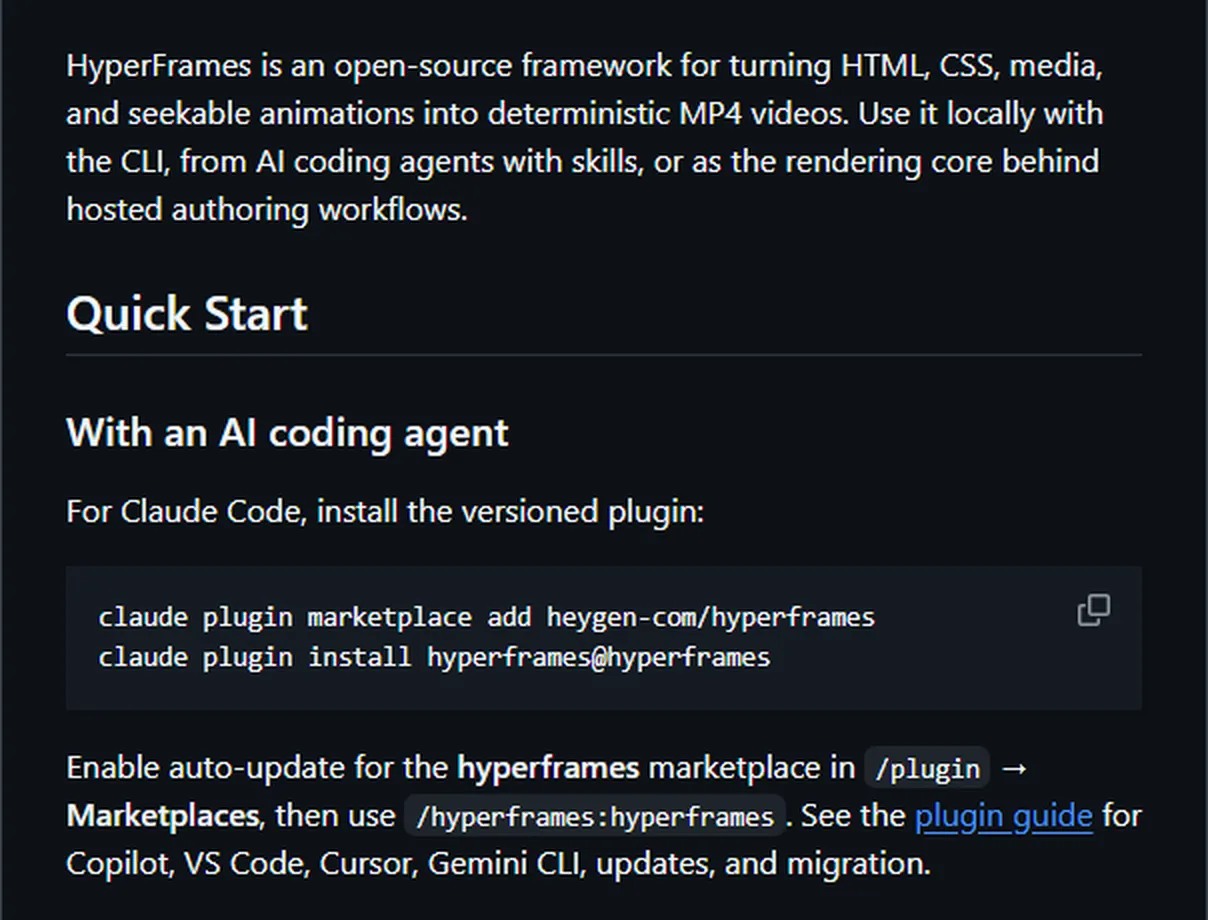
The README also says you can turn on auto-update under /plugin → Marketplaces in Claude Code, then call it with /hyperframes:hyperframes.
04One request, three jobs
Put the video in your project folder and paste this into Claude Code. Replace the parts in [] with your own.
Use Hyperframes to edit [video-file.mp4]:
1. Add word-by-word captions in the caption-highlight style, lighting up each word as it is spoken.
2. Find every silence first and cut the pauses longer than [0.5] seconds, leaving a little air on each side.
3. Push in on "[key line 1]" and drop in a title card that says "[title text]" on "[key line 2]".
Check everything at the end and export an MP4.
Claude Code first creates a Hyperframes project and puts your video in it. This is the command it ran for us; it reports the video's size and length.
npx hyperframes init edit-demo --video canary-raw.mp4
→ Video: 720x1280, 23.9s
051. Word-by-word captions: each word lights up as it's said
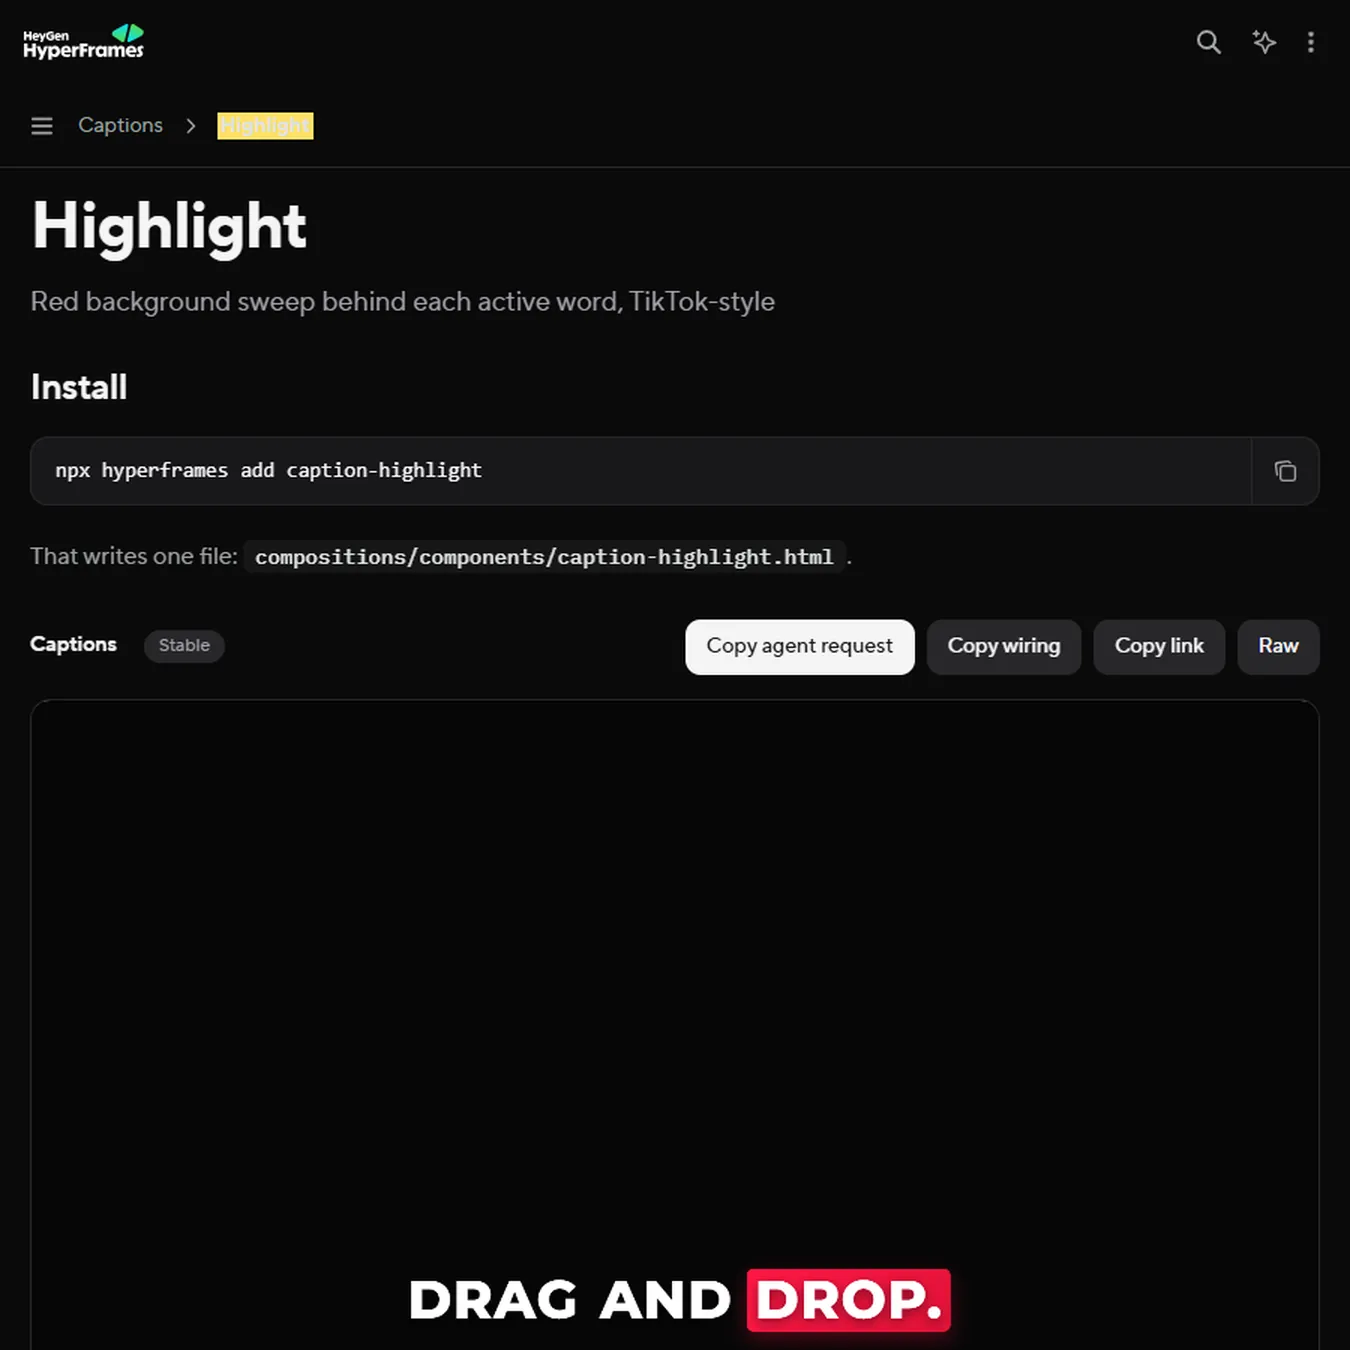
The caption style is Highlight (caption-highlight) from the official Hyperframes component catalog. The official description: a red background sweeps behind each word as it is spoken. This command adds it to your project.
npx hyperframes add caption-highlight
Here's the catch: captions need timings, the second each word is spoken. Hyperframes can transcribe on its own, but it needs a speech-recognition engine such as whisper.cpp (or Parakeet). On our Windows machine it wasn't set up, and running transcribe with --language zh returned whisper_unavailable. So our captions came from an SRT file we imported: we already had per-word timings from our own voiceover and turned them into an SRT.
npx hyperframes transcribe [your-captions.srt]
- Already have an SRT or VTT file: import it with the command above. transcribe also takes .json.
- No caption file and you want it to listen: set up whisper.cpp first. In the official transcribe help, the Whisper model options are tiny.en, base.en, small.en, medium.en and large-v3, and the default small.en is English-only, so for other languages set the language and the model. We did not test this route.
062. Cut the silences: measure first, then cut
Hyperframes has an audio command that measures where a recording is loud and where it is quiet. Claude Code uses it to find the silences, then decides which ones to cut.
npx hyperframes audio canary-raw.mp4 --only silence --silence-db=-40
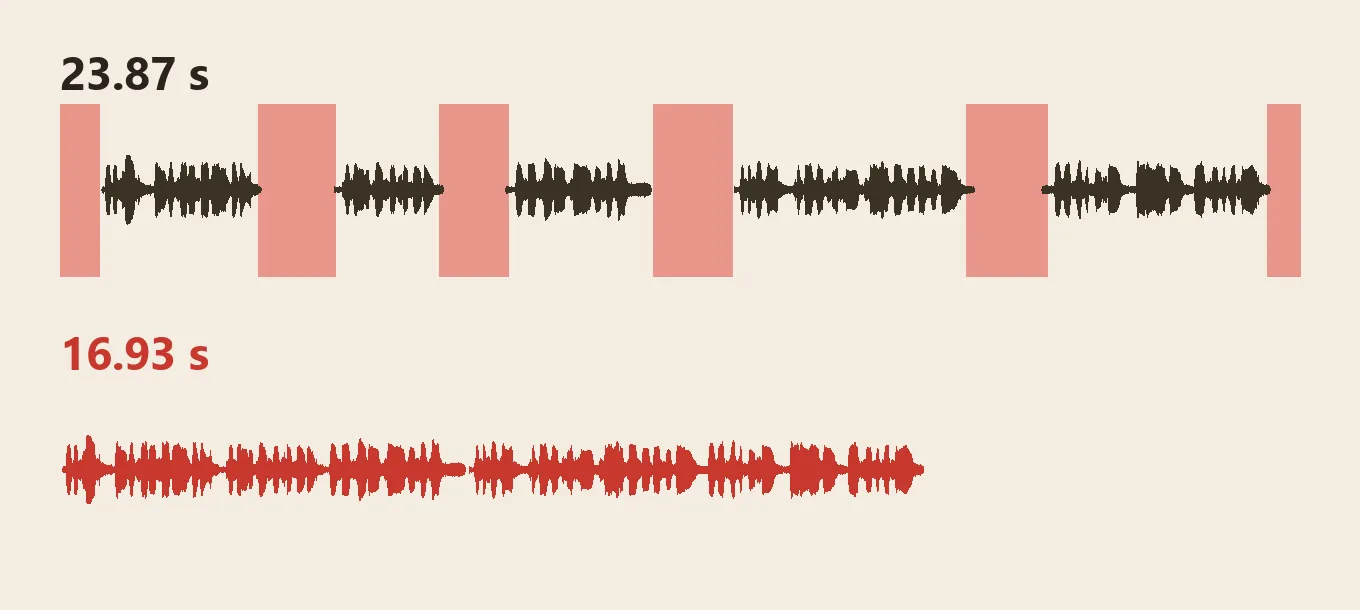
- It found 10 quiet spots in our raw clip.
- 6 of them were 0.5 seconds or longer: those are the pauses to cut. The short ones are natural breaths between words, so they stay.
- Each cut keeps 0.12 seconds on either side so it doesn't sound chopped.
- The result is 5 pieces joined together: 23.87 seconds down to 16.93, almost 7 seconds shorter.
Use hyperframes audio to find every silence in [video-file.mp4] and list them for me: which ones are longer than [0.5] seconds and where they are. Cut them only after I confirm, leaving [0.12] seconds on each side.
073. Animate the key moments: push-ins and a title card

I gave it three key moments: push in on "Vivian", drop a paper title card reading "Canary Alert" on "canary", and push in again on "got pushed out". The title card in the result image at the top is the second one. Claude wrote them as GSAP animations in the Hyperframes HTML, timed straight off the caption timings.
When I say "[keyword 1]", slowly push in on [the thing on screen], then pull back out when the line ends.
When I say "[keyword 2]", drop a title card from the top that says "[title text]", hold it for 1.5 seconds, then fade it out.
084. Check, export the MP4, and ask for changes in plain words
Before rendering, Claude runs lint to check the project for errors. We had 0 errors, then it rendered the MP4.
npx hyperframes lint
npx hyperframes render -o [output-file.mp4]
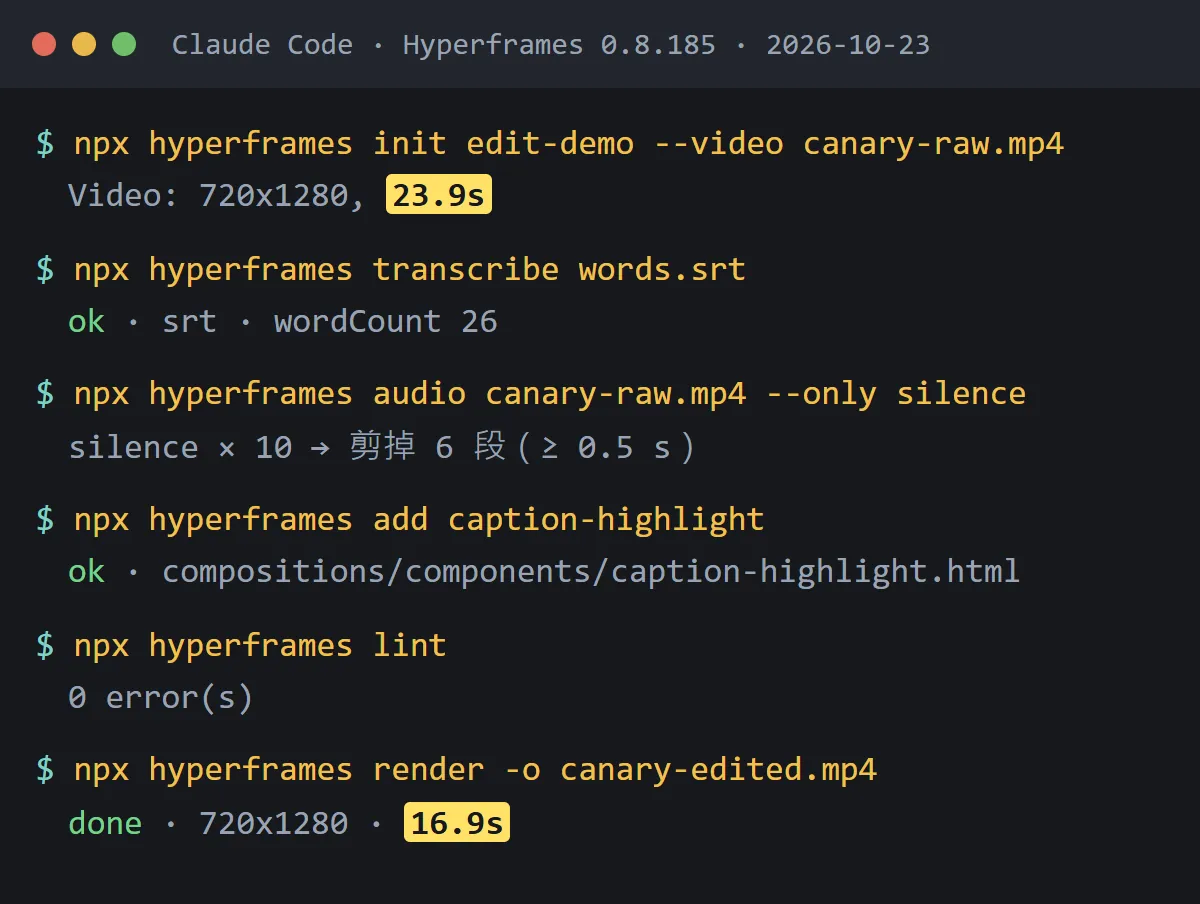
The output file is 720×1280, with audio, 16.93 seconds long. We checked it again with FFmpeg: no silence longer than 0.4 seconds is left.
Make the captions a bit bigger.
Zoom in a bit more at second [number].
Give the title card a different animation, [for example: slide in from the left].
Then export the MP4 again.
09How it differs from Claude Motion
- Claude Motion: Anthropic's own feature that turns your content into short animated videos. The official help article says it is in beta on Team and Enterprise plans.
- Hyperframes: an open-source tool that edits your own video: captions, cutting silences, adding animation. It runs on your computer, and Claude Code is the one giving it instructions.
In short: to turn content into an animation, look at Claude Motion; to edit a video you already have, use Hyperframes.
10Good to know
- Our raw clip is an animation we made, with pauses we planted. Real phone footage will have more silences and noise, so watch the edit through yourself.
- Our captions came from an imported SRT, not its own transcription. Auto-transcription needs whisper.cpp (or Parakeet) installed, and we have not tested how well it handles Chinese.
- Claude Code ran the Hyperframes commands directly, not through the plugin. For the plugin, follow the official README.
- Versions change: we used 0.8.185, and the latest on npm on 23 Oct 2026 was 0.8.186. If a command or option doesn't match, go by the official docs.
- "Free" means Hyperframes itself. Claude Code runs on your own Claude plan or usage.
- Claude Motion's plans and beta status were checked on 23 Oct 2026 and may change.
- Only download from the official addresses: github.com/heygen-com/hyperframes and hyperframes.heygen.com.
Sources
- Official GitHub: heygen-com/hyperframes (README: Quick Start, Requirements, Apache-2.0; checked 23 Oct 2026)
- Hyperframes component catalog: Highlight (caption-highlight; checked 23 Oct 2026)
- Hyperframes official docs
- npm: hyperframes (versions)
- Claude announcement: Build live dashboards and animate explainers with Claude (8 Oct 2026)
- Claude Help Center: Claude Motion (beta on Team and Enterprise; checked 23 Oct 2026)
What should the next reel cover?
I test Claude and AI tools every day and turn the useful ones into reels. Follow @vivianlin.tech to catch each new guide.